
If you haven’t already, install the WAR Binary Processing plugin into Eclipse.
Configuration
The typical contents of a WAR file include a META-INF directory that contains the WAR manifest, a WEB-INF directory that contains compiled Java Class files, support libraries, and a web.xml file. At the root level there are static web resources such as JavaScript, CSS, and images, as well as uncompiled JSP files (denoted below as the myjsps directory).
|-META-INF
|---MANIFEST.MF
|-WEB-INF
|---classes
|-----com
|-------example
|---------demo
|-----------SomeObject.class
|---lib
|-----mysql-connector-bin.jar
|-css
|--..
|-img
|--..
|-js
|--..
|-myjsps
|---default.jsp
A JSP file cannot be directly converted to Jimple, the JSP files must be translated (precompiled) to Java Class files first. AtlasWBP uses a configurable ANT task to precompile the JSPs to Class files given an appropriate translator (i.e. Tomcat Server). After the Ant build task has completed the directory tree will look something like the following.
|-META-INF
|---MANIFEST.MF
|-WEB-INF
|---classes
|-----com
|-------example
|---------demo
|-----------SomeObject.class
|-----org
|-------apache
|---------jsp
|-----------default_jsp.class
|-----------...
|---lib
|-----mysql-connector-bin.jar
|-css
|--..
|-img
|--..
|-js
|--..
|-myjsps
|---default.jsp
To clearly represent the application byte code in the project the contents of the classes directory are compressed into a single classes.jar JAR file at the root of the WEB-INF directory. The AtlasWBP plugin then converts the classes.jar file to Jimple using Soot and writes the resulting Jimple source to a new WEB-INF/jimple directory. These contents are included in an Eclipse Java project file that is mappable by Atlas for Jimple.
Since the implementation specific classes for each translator are not included in compiled WAR file, you must provide them and an Ant task to pre-compile the WAR with the dependent classes in order for the AtlasWBP plugin to decompile the WAR completely. The required support files for the current Tomcat releases (6, 7, and 8 at the time of this writing) are available below, if you don’t care about the specifics of which translator the WAR will run on then just use one of the provided support packages.
- apache-tomcat-6.0.45-translator-support.zip
- apache-tomcat-7.0.70-translator-support.zip
- apache-tomcat-8.0.36-translator-support.zip
- apache-tomcat-9.0.0M8-translator-support.zip
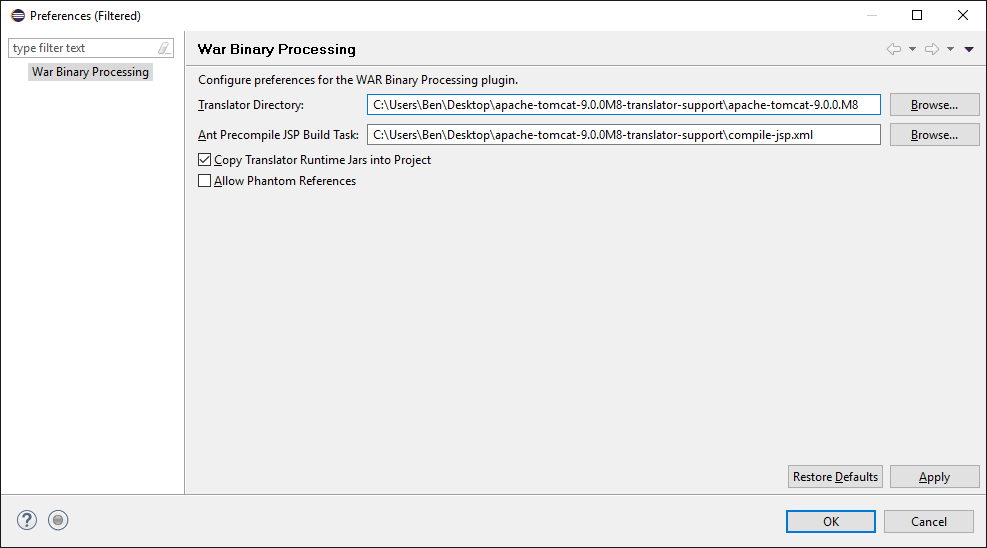
Before processing a WAR binary, you should remember to change your translator preferences by navigating in Eclipse to Eclipse (or Window) > Preferences > WAR Binary Processing. Alternatively navigate to Atlas Toolbox > WAR Binary Processing > Edit Preferences. At the preferences page, select the location of the translator directory and the ANT build task. The build task file for each of the provided Tomcat translators is included as the compile-jsp.xml file.
Older versions of Tomcat can be found in the archives for major versions 6, 7, 8, and 9. IBM’s Websphere has not been tested but a pre-compilation build task should be straightforward enough (see reference 1, reference 2, and reference 3).
Optionally, in the preferences window you may specify whether or not to copy the translator’s runtime JARs into project’s workspace (recommended if you plan to analyze the project on a machine other than the machine that created the project) or simply create external references to the libraries. There is also an option to allow phantom references in Soot when creating Jimple (not recommended unless you are having difficulty generating Jimple).
Processing a WAR
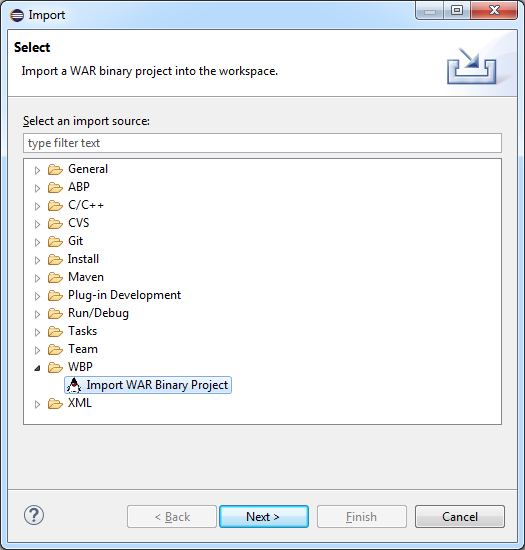
To process a WAR file simply use the WAR Binary Project import wizard. In Eclipse navigate to File > Import > WBP > WAR Binary Project. Note that information, warnings, and errors will be reported to the Eclipse Error Log (navigate to Window > Show View > Error Log.
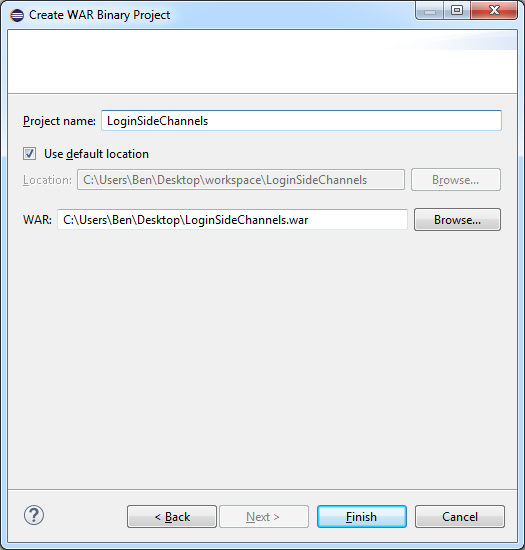
A sample WAR file for a vulnerable webserver application can be found at https://github.com/benjholla/LoginSideChannels.
To index the project, navigate to the Atlas menu and select Manage Project Settings. Ensure that the WAR file binary project is listed under the Map column and other projects that should be excluded from the analysis are not listed. Click OK when the project index settings are correct, then navigate to the Atlas menu and select Re-Map Workspace. When the indexing process is complete you can query against indexed project like normal. For additional information on using Atlas see http://www.ensoftcorp.com/atlas/.